UniSA

Showing posts with label engineering. Show all posts

Wednesday, August 19, 2009

Online conferences

Last weekend I participated in the MERLOT conference (Multimedia educational resource for learning online and teaching) in San Jose in California - but as a remote delegate. This meant that I
  • joined in to live keynote sessions using virtual classroom software (Elluminate) with a web cam on the speaker and the slides interacting via chat
  • participated in smaller breakout sessions interacting via chat and voice, and
  • created my Second Life alter-ego Eliamber Keger to get to some sessions in Second Life learning spaces
  • have access to recordings of the main sessions, as well as other resources.
Main problem - time difference - the sessions ran from 12 midnight to 9 am. I was okay the first night but reverted to recorded sessions afterwards.

I noticed that there is another online conference coming up that is relevant to our Division - the International Joint Conferences on Computer, Information, and Systems Sciences, and Engineering (CISSE 09). Fully online on December 4 - 12, 2009.

Find out more here http://cisse2009online.org/

Wednesday, August 12, 2009

Eportfolios in Engineering – Advantages and Disadvantages

Recently, John Fielke talked to us about his experiences with using e-portfolios in his course ‘Computer Techniques’. This posting will highlight some of the advantages and disadvantages John found when using PebblePad with his first year engineering students.

Using PebblePad as a webfolio tool with engineering students - Advantages and Disadvantages.

Advantages:
I chose to use PebblePad as a tool for the students to use to submit their computer models and drawings. The year before, we used AssignIT where the students put all their work into one zip file and uploaded it into AssignIT, producing a series of files for assessment. By using PebblePad, I was looking at linking those files together with a bit of reflection from the students about how they completed the assigned tasks. AssignIT requires all of the student’s work to be bundled into one zip file and submitted as one file. I have used this twice now with large files and on both occasions, AssignIT has crashed as the students were submitting these very large files at the same time. PebblePad not only allows multiple smaller files to be uploaded, the students can upload these files gradually each week.

I used the profiler tool to get the students to look at their work and reflect on their learning outcomes by answering a series of questions. The profiler tool is a dynamic, real time resource so we can look at the students’ work and provide immediate feedback, and allow the students to act on this feedback prior to their work being assessed. In addition, it can actually make marking very easy because work can be assessed as it is submitted rather than in a block at the end of the course.


Students saw growth in their knowledge

Another advantage is file preservation. If the students upload their work regularly, they reduce the risks of losing files or having their files corrupted.

Students can create a personal page with a photo of themselves, a few of their aspirations and a some personal background allowing academics to get know the students on a personal level and not just their name and ID number. If webfolios are used across multiple courses, the students can just call up this page into each course webfolio.

Disadvantages:

To utilise some of PebblePad’s features the students need to upload their work regularly, but many were reluctant to do this. Few students took the opportunity to respond to the feedback we provided and make changes to their work before it was formally assessed.

Some students did not understand the importance of sending their work to the gateway. We also had the issue of students thinking they could use the one webfolio for two courses resulting in some students sending work to the wrong gateway.

PebblePad is an interesting repository for work but the way it is structured, asset tracking and asset finding is not very user friendly. Asset management issues included students deleting files and breaking links between files, or updating a file and not updating the hyperlinks resulting in missing files. All we see is what students link to their webfolio, not the work that they have uploaded into PebblePad. Additionally, some students compressed their work up in file formats not able to be opened by the university computers. The students needed to resubmit in the correct zip file format. We held a session on webfolio development but less than half the students attended that session. The students who attended the session found it much easier than those who did not.

In hindsight, I realise that I should have asked the students to submit a single zip file each week and post a reflective comment about that week’s work rather than submitting up to 10 files for a week. Accessing multiple files is very time consuming in PebblePad.


A passionate group of students absolutely disliked PebblePad as it was either too difficult to use or too simplistic in its capabilities. Others wanted to personalise it to the limits that other web authoring software allows. PebblePad did not easily allow this. The other drawback of PebblePad is that we were looking at engineering drawings and whilst it allows viewing of jpegs their resolution was not high enough for us to read these drawings very clearly and individual files had to be opened in a series of cascading menus to view their work and this became quite time consuming.

Future Directions

Some of the improvements that could be made to Pebble Pad are to give it a corporate UniSA rather than a primary school feel. I would like to see it re-badged, corporatised and the PebblePad name removed. The interfaces, the fonts and low-tech look of it do not appeal to engineering students.

I still think that e-portfolios are a good learning tool for the students and they integrate and roll everything in together. The students have a record of their learning, which they can reflect on if they want to. My advice to other academics would be to get on board and use some of these developments that the university is resourcing and not try to do these things on your own, but have the corporate body backing you. After my experience with PebblePad this year, I would love to use some form of effective, interactive, feedback providing, reflective online submission method in the future.

Eportfolios in Engineering

Today, John Fielke will be talking to us about his experiences with using e-portfolios in his course ‘Computer Techniques’, which is one of eight core courses common to all of The University of South Australia’s Bachelor of Engineering degrees.

Dr. Fielke identified three interesting areas that arose from his experience with using e-portfolios, or webfolios, for the first time in 2009 in his Computer Techniques course.


The use of online formative feedback for students using webfolios
PebblePad is a ‘real time’ webfolio tool, which allows academics to review students’ work and provide formative feedback. During my Computer Techniques course I gave my students feedback and then allowed them to update their work. However, very few students took up this opportunity. I suppose the students could be helped to see the benefits of the provision of this type of formative feedback if marks were allocated for the use of the feedback, but it is still up to the students to decide if they want to use to take advantage of this.

Using the Profiler tool in PebblePad to assist students to reflect on his/her development of the UniSA Graduate Qualities
Another part of PebblePad that I used was the profiler tool where I got the students to reflect on their learning outcomes. The profiler offered the opportunity for me to ask students questions and I tailored these to allow the students to reflect on the university’s graduate qualities. For example, I asked questions about their background knowledge of computer-aided engineering drawing before the course, and then I asked them to rate their knowledge after the course.
The profiler tool not only provides information about the students, but also allows the students to reflect on their own development. For example, I asked the students to rate the effectiveness of their learning in specific learning environments such as the computer practicals or the lectures. This allowed the students to acknowledge that they did learn differently in different modes. The best part of the profile is that you see this in real time as the students are working on it and you can use the reporting function to find out where everyone is up to at a specific time.


Students reflected on their modes of learning

The students might be inclined to put off their thinking about the graduate qualities until they near graduation, however, presenting a series of questions that they have to answer about their current personal development makes them reflect on this and helps them to think very clearly about the skills they are developing even at this early stage of their studies.

Self-assessment using the Profile tool in PebblePad
I also used the profiler tool to ask the students to reflect on their effort and learning in the course, and predict their grades. I was surprised at the number of students that self-rated themselves quite low and identified that they did not put a huge effort into the course. They included many comments to justify why this was the case. Some students did think they deserved a HD, whereas other students thought they deserved a C and suggested that they had understood most of the course but had a few difficulties here and there. Some self- rated themselves as a P2 and commented that they did not try too hard, but thought they had done enough to scrape over the line. A couple of students rated themselves as an F and explained that they had not had the time to put the effort into the course. I was very surprised at how accurately they predicted their grades, probably within one grade. It really showed to me that the students do acknowledge the amount of work they put in and they do aim for a grade. They are not all after a HD for an assignment, they might like it but in reality, they are just going to do enough work to get the grade they are aiming for.

It was very easy using the profiler tool. The reporting function allows quick and easy access to information provided by the students. However, there is so much functionality in PebblePad that we still have not used.

Tuesday, June 16, 2009

Postgrad Engineering - online course design and experience

Today Yousef Amer will be talking to us about his course redesign experience for a postgraduate course, Supply chain management.

When I started designing this online course my aim was to have my students (class size of ~70) to be engaged and to get to the point that they were interacting and sharing knowledge. To do this I used Gilly Salmon’s 5 stage model of teaching and learning online as described in these books – e-moderating and e-tivities.

The web site was simplified as much as possible. We separated the web site into two sections - Teaching and Learning. The Teaching section contained e-readers, journals, books, solutions and PowerPoint presentations. The Learning side contained the interactive elements –the discussion groups and quizzes.

Addressing Stage 1, “Access and motivation” the front page was welcoming and outlined all the main folders and features of the course site. Students were reassured and encouraged to take time to become familiar with the site and information available on it. There was one face to face lecture that demonstrated the online environment to the students. I walked them through the different components of the web sites, highlighting the critical components – 3 discussion boards. One was a lectures notice board, one was a group discussion board where students could only access their own group (~10 students) and the final one was a general discussion board. Students were shown where regular communication occurred. I also provided a consultation time for those who needed one-on-one support mostly for technical support.

Stage 2 is “Online socialization”. The first activity was to ask students to introduce themselves online and provide some background in relation to work experience and qualifications and what their aspirations were. The communication rules were also spelt out.

In Stage 3 “Information exchange” the students were required to respond to another’s post in their discussion group. This gave them the opportunity to access work from at least one other student or the entire group if they wanted to, and the chance to peer review. I used weekly online quizzes to allow the students to self-assess their knowledge of the topic and become aware of where the gaps were in their knowledge and opportunities for development. To build up and establish the groups online e-tivities were assigned two weeks apart.

Stage 4 relates to “knowledge construction” – and this is where the students were working in groups. Most groups were communicating quite well and some were already tackling the group assignment in an organised fashion.

This sense of “development’ relates to Stage 5. Students spoke more freely and expressed themselves more openly online as compared to in lecture and tutorial setting. Communication was also more immediate with some students checking the discussion board daily.

As a online teacher it was an interesting experience. You could see the groups forming through the discussion board to become active and supportive of each other – finishing by exchanging telephone numbers and meeting times. For me it was important to keep track of their contributions so that the ‘quieter’ students didn’t get left behind. This was a bit tricky at times, especially as some students have similar names. Those students who weren’t making postings were encouraged by other students and if they disappeared for too long were emailed by myself. Concerns about their expression of English was common – but after I reassured them that they were not being assessed on spelling and grammar, that they became more active in the discussion.

The student evaluations of these learning experiences has been very positive particularly the way that this learning can be applied in real situations.

Tuesday, May 5, 2009

Putting Defence lecture material on-line

Peter Hamilton (Defence and Systems Institute) writes about his approach to e-learning by using online presentations to replace the lectures.

I had the job of creating an Associate degree in Engineering (Defence Systems) program where all students would be working in industry and needed flexibility for learning. The students were more mature and had worked in manufacturing engineering roles, primarily as technical officers, and needed to retrain for work in companies that service the growing Defence industry.

Below is a presentation that describes the project (UniSA staff can view the web sites linked within the presentation).

One of the strategies used was a 'lecture capture' technique where we made short recordings of the topics given by our course experts that could be accessed online 24x7. We had financial support from the federal government to implement the program and create the resources.

To make this happen, I purchased 6 licenses for Adobe Presenter 7, the application software underlying the ‘In a Nutshells’, in about Sep/Oct 2008. It works as a PowerPoint add-in that publishes that allows ‘narrated PowerPoint presentations’ to be created and saved on a special server in ISTS. The process of up-loading narrated presentations to the Server is centrally controlled by me.

The tool is relatively easy to use with most lecturers being able to master the tool in under 30 minutes. Narrated presentations have been created in a number of ways depending on the preferences of the lecturer:


  1. Lecturers use an existing PowerPoint presentation for which they have prepared a script or, sometimes, good notes. Lecturers then record the script using the Presenter 7 tool. The script becomes the ‘Notes’ component of the narrated presentation.

  2. Lecturers use an existing PowerPoint presentation but without a script. Using the Presenter 7 tool they record the narration for each slide speaking ‘off-the-cuff’, prompted by the slide content. The sound file is then transcribed into a Word document by a professional transcriber; is edited by the lecturer to eliminate ums and arghs; and forms the ‘Notes’ component of the narrated presentation.

  3. Lecturers present a PowerPoint based lecture in the normal face-to-face fashion. The lecture is recorded using a digital recorder. The sound files are transcribed in the same way as above. Using Presenter 7, the sound files are uploaded to match the PowerPoint slides while the transcribed and edited sound file is used as the ‘Notes’ component of the narrated presentation. This is a quite labour intensive process.
These recordings have been well received by students both on-line and on-campus as they can revisit them as often as they like. We have sometimes just played them as a lecture and still the students appreciated them as they were very clear.

We need to be mindful of the length of the recordings as there is only a certain amount of time that someone will look at their screen to watch a recording. Our average lecture length is about 20-30 minutes, some a little longer, others a little shorter. For a lecture, I consider about 30 minutes to be optimal.

Wednesday, April 22, 2009

Capturing lectures

When developing content for teaching in online courses, or providing extended flexibility for face-to-face or external students, many people consider the use of lecture capture techniques. Lecture capture could be as simple as making an audio recording of a lecture and slides/notes available online or can involve using sophistocated software programs that link together the voice, visuals and resources.

Educause put together a short document called the 7 things you should know about Lecture capture that describes what it is and considers the significance, implications and downsides.

One of our first podcasters at UniSA was Tim Sawyer in Medical Radiation - he prepared this short presentation about his approach to share with others in 2007 (6 minutes) as he was quite impressed with how much his students engaged with the recordings.

Currently we don't have any automated systems to do podcasting or lecture capture at UniSA - although last year we were close to getting Lectopia - an automated record and publish tool installed in lecture theatres - but for some reason it all faded away. If you want to make recordings you need to have access to your own (school's) recorder.

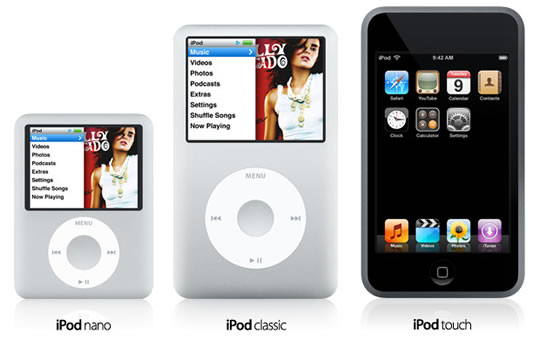
If you do want to try making audio recordings, Online advisers will set up "podcasting" environments for courses that students can subscribe to to receive lecture recordings to their ipod as soon as they are available. A manual upload of audio files and pdf documents (lecture notes) by the lecturer is required.

Our next blog post will be from Peter Hamilton from DASI who has used Adobe Presenter as his main lecture capture tool for courses in the Associate Degree in Engineering (Defence Systems).

Stay tuned ....

Friday, April 3, 2009

A conversation with Peter Kentish about Moodle quizzes

I cornered Peter Kentish recently, gave him coffee, a comfy chair with a cushion and asked him to recount  some of his experiences about using Moodle quizzes to share with our readers. 

Q: How come you are using Moodle Quizzes now?
It all started in 2007 when the new common first year in engineering began. I had always taught my old Engineering Materials course with a cohort of 60-70 students using 6-7 multiple choice and text-based questions but now, with the new common first year core course it was going to be 200! There was no way I was going to be able to do all that marking! I knew  that the quiz approach had worked well for motivating my students to learn consistently in this course so I asked for an automated system to help me mark these tests. 

It wasn't the first time I had asked for an automated assessment system. The UniSAnet team tried several times but were quite frustrated in their efforts to create an in-house 
online assessment tool and resorted to trialling the Moodle version. I was one of 2 people who were allowed to use this environment and test it for the University. 

How do you use it?
I run 6 tests during the study period for this course. For each these there is actually a pair of quizzes. The first is a practice (non-assessable) one that students can attempt as many times as they like, find out which they got right or wrong and also what the right answer is. Then there is an assessable version that counts for grades.  There about 30-35 items in the assessable one and 15 or so in the practice version. 

A screen grab from the Moodle quiz environment
 
Students do the assessable quizzes in a computer pool during their tutorial time. I set the time the quiz is open for and a password - I make these up so they are different for each tutorial class. When all the classes have finished taking the test I send them their results which have been automatically marked. 

What has it been like using Moodle quizzes?
The system itself has been quite good - robust.  There have been virtually no bugs in the system - just one that hasn't been solved. This has no negative effects provided you are aware of it.

Like most things there are positives and negatives - there has been a lot of time setting up the database of questions, but the time saved with the auto marking has more than made up for it - particularly as I am now in the second year. The benefit will continue for future years as less time is required in maintaining the database.


How do you come up with your questions?
When I first started I had my old questions that needed to be entered into my database which took a long time. Now, when I want to set up a test I create a shell for it (setting the time and password for the class) and select the questions I want from my database. Each year I choose different questions. I also use the random shuffling functionality - my selected questions are presented in a different order and answer options are also in different order for each student (this shuffling feature can be turned off). 

Also, at tutorials I get ideas for questions where the content is applied to problems and write new questions to add to my database. This is good as I really want to test students application of knowledge rather than recall of memorised facts.  

Also, tutorials are not assessed directly, so to motivate students to engage with the tutorial activities I warn them that a certain amount of the quiz items are going to come from the tutorials so they need to do this work (i.e. memorisation of facts will not be enough to be successful - you are not very good as an engineer if you are not able to apply knowledge to solve problems!)
An example of a question from a practice quiz

What do the students think?
They generally like MCQ best - they think they have an advantage as the right answer is there they just need to find it.  For the first practice quiz there were over 958 attempts - some students attempted it 15 times, others not at all. The average mark for the test was about 70%. 
Even though the students were advised that quiz 2 would be more complex than the first, the number of attempts on the practice test did decrease to 795 -probably because the students have more competing interests or they have been lulled into a false sense of security from test 1. The average mark for this second test, which was more difficult,  was  lower - around 60%.